Tutorials
How to Remove a Row from Retool ListView Dynamically
If you're trying to remove a row from a Retool ListView and all you can figure out is how to delete the last row by decrementing the row count, you're not alone. Knowing how to remove a specific row from a Retool ListView — especially one that isn't loaded from a database — is one of those problems that trips up almost everyone the first time. This tutorial gives you the complete, working solution using temporary states and JavaScript queries.
Why Decreasing the Row Count Doesn't Work
The ListView component in Retool uses a Number of Rows property to control how many rows are rendered. When you decrement that number, Retool simply removes the last row — it has no concept of "remove row at index i." To delete a specific row by index, you need to manage the ListView's data yourself using temporary states and splice it out with JavaScript before re-rendering the list.
The Pattern: Temporary State + JavaScript Queries
The core approach is straightforward: store your ListView's current values in a temporary state, remove the target row from that state using JavaScript's splice(), update the row count, and then refill the ListView from the updated state. Retool's built-in i variable (available inside a ListView) tells you exactly which row triggered the delete button — making this pattern clean and reliable.
Step-by-Step: Setting Up the Components and States
- Create a temporary state named
tempData. Set its initial value to a JSON object representing your rows, for example:{"rows": [{"name": null}]}. Each object in the array should have a key for every input component in your ListView. - Create a second temporary state named
tempNumRowswith an initial value of1. - Add your
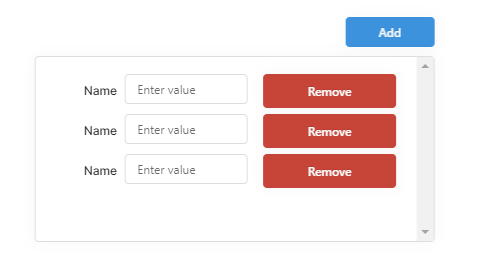
listView1component and set its Number of Rows to{{ tempNumRows.value }}. - Inside the ListView, add your input component (e.g.
textInput1) and a Remove button (buttonRemove). - Outside the ListView, add an Add Row button (
buttonAdd).
Step-by-Step: Writing the JavaScript Queries
You'll need four scripts. Create them as JavaScript transformers or queries in Retool's query editor.
1. getCurrentData (JavaScript Transformer) — Reads the current live values out of the ListView:
var formData = {{ listView1.data }}; var currentData = { "rows": [] }; for (let i = 0; i < formData.length; i++) { var name = formData[i]["textInput1"]; currentData.rows.push({ "name": name }); } return currentData;
2. addNewRow (JavaScript Query) — Saves current data, appends an empty row, and updates both temp states:
var currentData = getCurrentData.value; currentData.rows.push({ "name": null }); var currentDataSize = Object.keys(currentData.rows).length; tempData.setValue(currentData); tempNumRows.setValue(currentDataSize);
3. deleteCurrentRow (JavaScript Query) — Uses the built-in i variable to splice out the correct row:
var currentData = getCurrentData.value; currentData.rows.splice(i, 1); var currentDataSize = Object.keys(currentData.rows).length; tempData.setValue(currentData); tempNumRows.setValue(currentDataSize);
4. refillForm (JavaScript Query) — Repopulates the ListView inputs from tempData after any change:
for (let i = 0; i < Object.keys(tempData.value.rows).length; i++) { textInput1[i].setValue(tempData.value.rows[i].name); };
Step-by-Step: Wiring Up the Triggers
- In both
addNewRowanddeleteCurrentRow, set the On Success trigger to runrefillForm. This ensures the ListView is repopulated only after the state has been updated. - Add an event handler to
buttonAdd: Event = Click, Action = Trigger Query, Query =addNewRow. - Add an event handler to
buttonRemove: Event = Click, Action = Trigger Query, Query =deleteCurrentRow. - Optionally, disable
buttonRemovewhen only one row remains by setting Disable when to{{ Object.keys(form.data).length == 1 }}.
How to Reset the ListView to Its Initial State
If you need to reset the ListView — for example, when a modal re-opens — you must reset both temporary states before triggering refillForm. Set tempNumRows back to 1 and tempData back to {"rows":[{"name":null}]}, then call refillForm.trigger(). If the input values aren't clearing, double-check that refillForm is referencing the correct index and that tempData has been fully updated before the refill runs — chaining these as On Success triggers ensures the correct order of execution.
Key Takeaways
- Retool's
ListViewhas no built-in method to remove a row by index — you must manage state manually. - The built-in
ivariable inside a ListView always resolves to the row index of the component that triggered the query, making it perfect for targeted deletes. - Using
splice(i, 1)on your temporary state array is the cleanest way to remove a specific element before re-rendering the list. - Always chain your state updates and
refillFormvia On Success triggers to avoid race conditions.
This pattern scales well even when your ListView has multiple input types — just extend the row objects in tempData and add the corresponding setValue calls in refillForm for each component. Once it clicks, managing dynamic ListViews in Retool becomes second nature.
Ready to build?
We scope, design, and ship your Retool app — fast.